The Animation Pipeline Steps Every Project Follows

Every animated project, from a fifteen-second logo bumper to a feature film, moves through three phases: pre-production, production, and post-production. This guide breaks each one into its working steps, the deliverables that pass between them, and a print-ready checklist you can use on your next project. Along the way, you’ll see where an animatic earns its keep, what a render pass actually contains, and where a tool like Blender fits into a working studio’s toolkit.
We treat these animation pipeline steps the way a production architect treats a building. Skip the foundation work and the cracks show up two floors later.
Pre-production: concept, script, storyboards, animatic, visual development
Production: layout, modeling, texturing, rigging, animation, FX, lighting and rendering
Post-production: compositing, sound, color grading, editing, delivery
Key Takeaways
The animation pipeline succeeds when pre-production decisions are locked early, production handoffs stay documented, and post-production finishes with a clean, versioned delivery.
Point | Details |
Three core phases | Pre-production, production, and post-production each hand off specific deliverables to the next. |
Animatics catch problems early | Timing issues found in an animatic cost an edit; the same issue found during animation costs a re-block. |
Rigging discipline prevents rework | Testing deformation against extreme poses before animation begins avoids costly late-stage fixes. |
Naming and storage discipline | Centralized storage and consistent naming conventions cut down on file-chasing delays. |
Vainnewyork as a partner option | Vainnewyork offers full production and consultancy services for teams who prefer a partner over managing the pipeline in-house. |
Table of Contents
What Is an Animation Production Pipeline, Really?
A pipeline is not a to-do list. It’s a production architecture, a structured chain linking people, hardware, and software so that a decision made on day one still holds up on day ninety. When a director locks a character’s silhouette in visual development, that choice ripples forward into rigging complexity, render time, and even the compositor’s workload months later. Upstream decisions create downstream dependencies that determine both the schedule and the budget, which is why studios obsess over getting the early phases right instead of fixing problems in the final stretch.
Each phase produces its own deliverables, and each deliverable becomes the next department’s starting material:
Pre-production locks the creative and narrative decisions. It hands off a script, storyboard, animatic, and style guide.
Production builds and animates everything the story requires. It hands off rendered image sequences broken into passes, ready for finishing.
Post-production assembles those passes into a polished, deliverable file. It hands off masters formatted for whatever platform the client needs.
The order shifts depending on whether you’re working in 2D or 3D. A 2D project often moves in a more linear line: storyboard to animatic to clean animation to compositing, with fewer parallel departments. A 3D pipeline branches much earlier. Modeling, rigging, and texturing can happen simultaneously on different assets while layout locks camera blocking, and lighting can’t truly begin until animation is far enough along to read the performance. That parallel structure is efficient, but it also means a broken handoff (a rig that doesn’t deform correctly, a model exported with the wrong scale) can stall three departments at once instead of one.
Pre-Production: Locking Decisions Before Anyone Touches an Asset
Pre-production is where a project either sets itself up to run smoothly or quietly builds in the rework that shows up six weeks later. Every hour spent here is cheap compared to the same fix made after modeling or animation has already started.
Building the creative brief
The brief is the contract every department will reference for the rest of the project. A solid one specifies the audience, the final format (square social clip, 16:9 broadcast spot, vertical app content), the exact duration, the delivery platform, and any mandatory assets, like a logo lockup or a legal disclaimer that has to appear on screen. Vague briefs are the single most common cause of late-stage revisions, because nobody agreed on the target up front.
Script and treatment: locking timing before it costs you
The script or treatment isn’t just words on a page. Dialogue timing and overall pacing get locked here, because those decisions directly set the shot count and scene lengths that production will build around. A treatment that reads well on paper can still run long once it’s actually voiced and timed, so many studios do a rough scratch read before moving forward.
Visual development: deciding what the world looks like
Visual development is where style frames, character concept art, and color keys get produced and approved. This is the cheapest possible place to test a bold color palette or an unconventional character design, because nobody has built a rig or a texture set yet. A style frame that gets rejected here costs an afternoon. A model that gets rejected after texturing costs a week.
Storyboards and the animatic
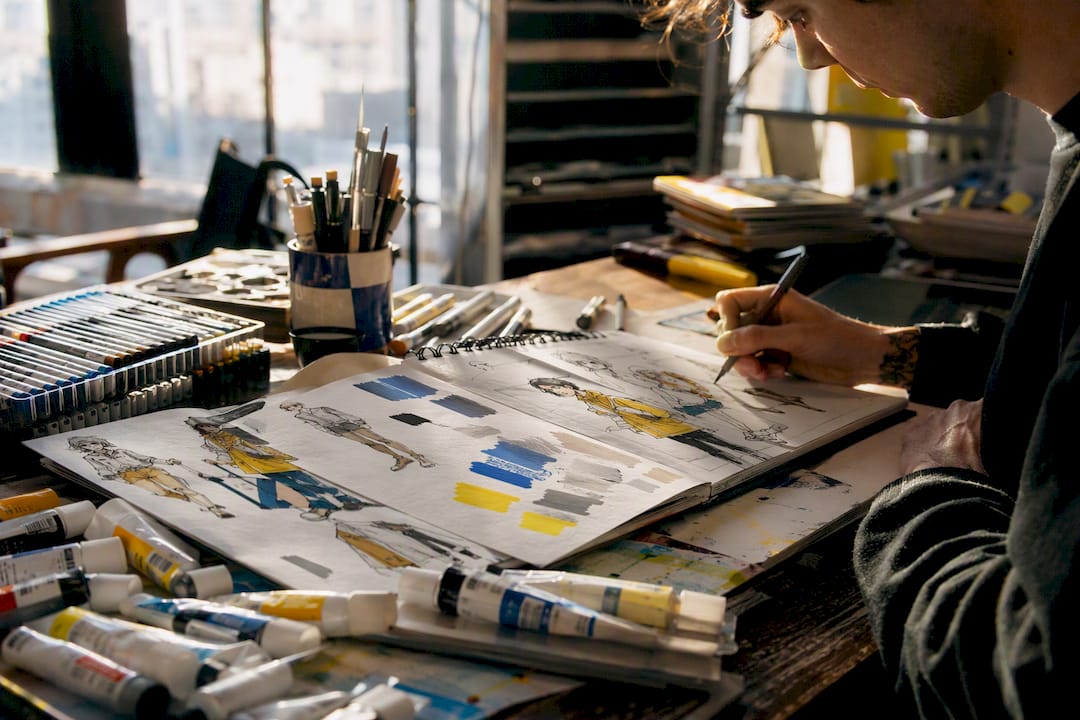
Storyboards translate the script into a shot-by-shot visual sequence: camera angles, character positions, key compositions. The animatic then takes those boards and cuts them to temporary audio, timing every shot to its actual planned length. This step matters more than most beginners expect. Animatics with temp audio are one of the cheapest, most reliable ways to catch pacing problems, a joke that lands a beat too late, a transition that feels rushed, before a single asset gets built. Catching a timing problem in an animatic costs an editing pass. Catching it during animation costs re-blocking entire shots.
Pro Tip: Cut your animatic with the actual planned frame rate and aspect ratio, not a rough placeholder. A timing problem that looks fine at the wrong ratio can resurface as a real issue once the final format is locked.
Before anyone opens a modeling program, a project should have sign-off on:
Approved script or treatment with locked dialogue timing
Approved character and environment style frames
Approved storyboard sequence
Approved animatic with temp audio and locked shot lengths
A written style guide covering color, line weight, and any technical constraints
Skipping any one of these doesn’t save time. It just moves the cost, and usually multiplies it, into production.
Production: Where Assets Get Built and Brought to Life
Production is the longest phase on most schedules, and it’s where the ordered handoffs matter most. Get the sequence wrong, or let one department start before the last one finished, and you create the exact kind of rework the earlier planning was supposed to prevent.
Here’s the practical order most studios follow, and what has to be true before each step can start:
Layout: Camera angles and scene blocking get established using rough placeholder geometry or plate references. This is essentially 3D storyboarding, confirming that the animatic’s timing still works once real camera moves and staging enter the picture.
Modeling and asset build: Characters, props, and environments get built to spec, following approved topology standards and consistent naming conventions so every asset can be found and swapped without confusion later.
Texturing and lookdev: Surface materials, color maps, and roughness maps get painted and approved, often using UDIM tiles for high-resolution characters, locking the final visual look before rigging complicates the geometry.
Rigging: A skeleton and control system get built into the model, then tested against extreme poses to confirm the deformation holds up under stress, not just in a neutral pose.
Blocking: Animators place rough key poses to establish timing and staging, working loosely before committing to detail.
Animation refinement: Blocking moves into breakdowns, then spline curves smooth the motion, then a polish pass fixes any remaining mechanical or unnatural movement.
FX and simulation: Smoke, cloth, water, or particle effects get simulated and cached, with bake checkpoints saved so a crash doesn’t cost hours of recalculated simulation.
Lighting and rendering: Scenes are lit and rendered out as multiple passes, diffuse, specular, shadow, depth (Z), and various AOVs, so compositing has full control over the final look without needing a full re-render for small adjustments.
Rigging deserves particular attention, because it’s the step most likely to quietly break everything downstream if it’s rushed. A rig that hasn’t been tested against extreme poses might look fine in a demo but fail the moment an animator asks a character to reach, twist, or fall. Practitioner experience across studios suggests that locking character topology and finishing rig testing before animation blocking begins is one of the highest-leverage decisions in the entire pipeline, because a topology fix after animation has started forces that animation to be redone from scratch.
Small teams often compress several of these steps. A solo animator might model, rig, and animate the same character in sequence rather than handing it between specialists. The order still matters even when one person wears every hat: skipping straight from a rough model to animation, without pausing to test the rig, creates the same deformation problems a five-person studio would run into.
Review cadence keeps all of this honest. Most productions build in checkpoints, a blocking review before splining begins, a lookdev approval before lighting starts, so that a director’s feedback arrives while a fix is still cheap. Waiting until a shot is fully polished to get creative feedback is one of the most expensive mistakes a production can make, because by then every fix touches finished work instead of rough drafts.
Post-Production: Turning Raw Renders Into a Finished Deliverable
Post-production takes everything production generated and assembles it into something a client, a broadcaster, or a social platform can actually use. It’s less about creating new material and more about finishing what already exists with precision.
Compositing sits at the center of this phase. A compositor takes the separate render passes, diffuse, specular, shadow, and the rest, and layers them together, adjusting each independently rather than re-rendering the whole scene for a small tweak. Combining render passes with targeted 2D fixes is almost always faster and cheaper than sending a shot back to full render, and knowing when a fix belongs in compositing versus when it genuinely requires a re-render is one of the judgment calls that separates an efficient post team from a slow one.
Sound design usually runs in parallel with compositing. Temporary voice-over from the animatic gets replaced with final recorded dialogue, sound effects get built or licensed, and a mix pass balances dialogue, effects, and music. Studios typically deliver stems (separated audio tracks) alongside a final mix, so a broadcaster or platform can remix for their own specs if needed. Sample rates and formats should be locked early, since a mismatch discovered at delivery is a frustrating, entirely avoidable delay.
Color grading is where the project gets its final look lock, adjusting contrast, saturation, and color balance across the whole piece so every shot feels like it belongs in the same world. This happens after compositing, once every shot is assembled, so the colorist is grading a coherent sequence rather than isolated fragments.
Editing brings picture and sound together into master files, and this is also where format decisions get finalized: codec, frame rate, aspect ratio, and any platform-specific export requirements. A file destined for broadcast has different technical needs than one built for a vertical social feed, and getting this wrong at the last step means re-exporting everything.
A few habits protect a project at this stage:
Keep every version named with a clear convention (project, shot, version number, date) so nobody works from a stale file.
Store final masters in a dedicated archive folder, separate from working files, before the project wraps.
Deliver both a full-resolution archive master and any platform-specific compressed exports the client actually needs.
Document every asset dependency so the project can be reopened and understood a year later.
Which Tools and File Formats Move Between Departments?
Every handoff in this pipeline depends on a specific file leaving one department and arriving, intact and correctly labeled, at the next. Getting the tools and formats right prevents the single most common source of delay: a file that opens wrong, exports incomplete, or simply can’t be found.
Blender is a genuinely useful example here because it covers so much ground in one package: modeling, rigging, animation, and rendering all live inside the same software, which makes it a practical starting point for solo creators or small teams who don’t want to jump between five separate applications. Larger studios often still split these jobs across specialized tools, a dedicated compositor, a digital audio workstation for sound, and a separate rendering engine, but the underlying handoffs stay the same regardless of which software produces them.
Common interchange formats carry data safely between different programs. OBJ and FBX handle models and basic animation, USD has become the standard for complex scene assembly across multiple software packages, Alembic handles cached animation and simulation data efficiently, EXR is the standard format for multi-pass renders because it preserves the full dynamic range compositors need, and WAV remains the standard for uncompressed audio handoffs.
Centralized storage and standardized naming cut down dramatically on the time teams lose chasing the “right” version of a file across scattered folders, emails, and chat threads. A shared repository, whether that’s a cloud drive or a dedicated pipeline tool, should hold the current approved version of every asset, with older versions archived rather than deleted.
Here’s what a clean handoff actually contains at each checkpoint:
Handoff Point | What Gets Delivered |
Modeling to rigging | Finished model, clean UVs, correct scale and orientation |
Rigging to animation | Rig with bind pose set, tested deformation, control documentation |
Animation to lighting | Cached animation data, camera moves locked |
Rendering to compositing | Multi-pass EXR sequences with cryptomatte for object isolation |
Compositing to editing | Final graded shots in the agreed delivery codec |
Who Owns Each Piece of the Pipeline?
Clear ownership prevents the two most common team failures: two people duplicating work, or nobody realizing a task was never assigned. Here’s how responsibility typically breaks down.
The producer owns the schedule, budget, and client communication, and signs off on whether a milestone is actually ready to move forward.
The director owns the creative vision and approves storyboards, animatics, and any major staging or performance decisions.
The art director owns the visual style, approving color keys, character designs, and lighting looks for consistency.
The modeler builds clean, animation-ready geometry and hands off finished assets with correct topology.
The rigger builds and tests the control system, delivering documentation so animators know exactly how a character bends and moves.
The animator owns performance and timing, taking a rig through blocking to final polish.
The compositor assembles render passes into finished shots and makes the final call on 2D fix versus re-render.
The sound designer builds the audio landscape and delivers final mixed stems.
On a small team or a solo project, one person often holds several of these titles at once. The fix isn’t to skip roles, it’s to keep the same approval gates even when you’re approving your own work: don’t move from rigging to animation without actually testing the rig, just because there’s no separate rigger to sign off.
Where Do Pipelines Actually Break Down, and How Do You Fix It?
Most pipeline delays trace back to a small set of repeat offenders, and nearly all of them are preventable with earlier discipline rather than more overtime.
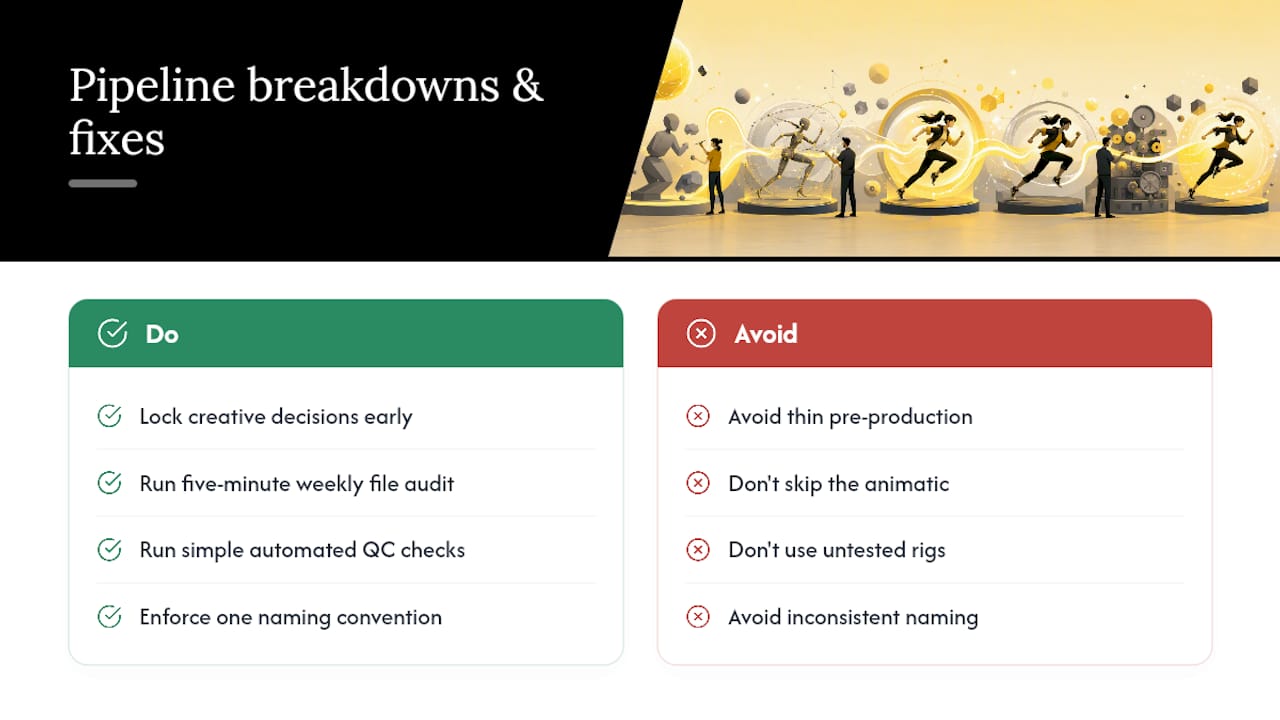
Thin pre-production is the most common root cause. When a script or storyboard gets approved too loosely, the ambiguity doesn’t disappear, it just resurfaces later as a debate during animation review, when fixing it costs far more. Unstable rigs are the second major culprit: a rig that wasn’t tested against extreme poses will eventually fail on exactly the shot that needs it most, usually late in the schedule. Skipping the animatic is a third recurring mistake, teams that feel rushed sometimes cut this step, only to discover a pacing problem after several expensive shots are already built. Inconsistent naming and version conventions round out the list, causing teams to burn hours locating the correct file instead of doing the work.
The fixes are straightforward, even if applying them takes discipline. Lock creative decisions during pre-production and resist the urge to revisit them once production starts. Build simple automated QC checks, a script that flags missing textures or incorrect naming before a file gets submitted, rather than catching it manually. Adopt one naming convention across the entire project and enforce it from day one. And keep a single source of truth for every asset, so nobody is ever working from an outdated version by accident.
Knowing when to rework something and when to accept a compromise is its own skill. A rig deformation problem that will affect every future shot is worth stopping to fix immediately. A minor color inconsistency in one background element that nobody will notice at delivery resolution usually isn’t worth the schedule hit.
Pro Tip: Run a five-minute naming and file-check audit at the end of every week, not just at major milestones. Small inconsistencies caught weekly stay small. Left for a month, they compound into a real cleanup job.
Pipeline quality depends less on any single artist’s individual skill and more on whether handoffs, stable topology, tested rig deformation, documented approvals, hold up under real production pressure.
Your Print-Ready Pipeline Checklist
Keep this near your desk. Each step lists what “done” actually looks like before you move to the next.
Brief approved: audience, format, duration, and platform all documented in writing.
Script/treatment locked: dialogue timing and pacing confirmed.
Visual development approved: style frames and color keys signed off.
Storyboard approved: full shot sequence confirmed.
Animatic approved: temp audio cut in, shot lengths locked.
Layout complete: camera blocking confirmed against the animatic.
Assets built: models, textures, and rigs tested and approved.
Animation complete: blocking through polish reviewed at each milestone.
Render passes delivered: full AOV set exported as EXR sequences.
Composite, grade, and mix locked: final look and sound approved.
Master delivered: correct codec, aspect ratio, and archive copy stored.
For a broader look at how these stages map onto full media production timelines, our guide to media production is worth a read.
What We’ve Learned Applying This Pipeline on Real Projects
The projects that come in on time are almost never the ones with the most talented animators. They’re the ones where a rig got tested before blocking started, and where nobody let “we’ll fix it later” survive past pre-production. That discipline, more than any single tool, is what separates a smooth production from a scramble. It’s a lesson we’ve carried across our own production work, and one worth internalizing before your next project begins.
Need a Production Partner Instead of Running This Yourself?
Running a full pipeline solo, script through final delivery, is realistic for a short social clip. It gets a lot harder once you’re juggling rigging, lighting passes, sound design, and a client deadline all at once. That’s the point where a lot of creators and brands decide it’s smarter to hand the pipeline to a team that already runs it daily rather than learning every handoff the hard way.
Vainnewyork works as a creative production and consultancy partner, handling animation, video, and brand development from concept through final delivery, so you get a finished, publish-ready asset without managing eight different specialists yourself. If your project needs a tight animatic, a full 3D pipeline, or just an experienced producer keeping every handoff on schedule, get in touch with Vainnewyork to talk through your project and timeline.
Sources
Recommended
Comments